I have been neglecting this blog for so long, that I think it was threatening to get rid of me!
I am well, have a new PaceMaker to keep the ol’ heart beating on time and have survived another Edmonton Winter. I spend far too much time trying to understand and lately combatting the illeral left and their ideological wars or free speech and the increasing racism of the “anti-racists”.
However, I had occasion to want to learn how to do a video edit, without clogging up my overloaded hard drive, so I tried Microsoft’s new and free of charge ClipChamp program. Of course I had to have a video file to practice on, so I stumbled upon a recording I did last year of the Huron Carol. I managed to edit it a bit and add a title and save and publish it – so very belated or early Winter Solstice/Christmas greetings to all.

https://www.youtube.com/embed/PVtaMOBvu-4?si=4h2qVViBZvXTVUBX%20title=YouTube%20video%20player%20frameborder=0%20allow=accelerometer;%20autoplay;%20clipboard-write;%20encrypted-media;%20gyroscope;%20picture-in-picture;%20web-share%20referrerpolicy=strict-origin-when-cross-origin%20allowfullscreen/iframe
You are browsing archives for
Category: hammer dulcimer
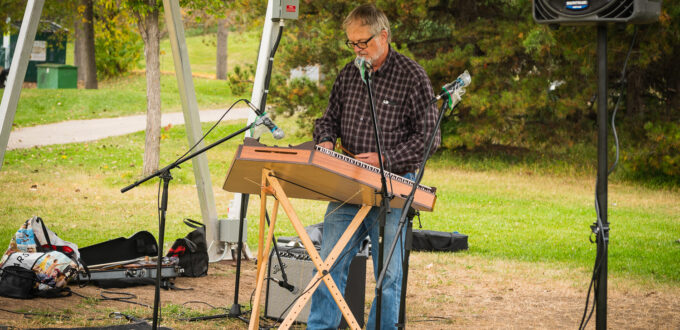
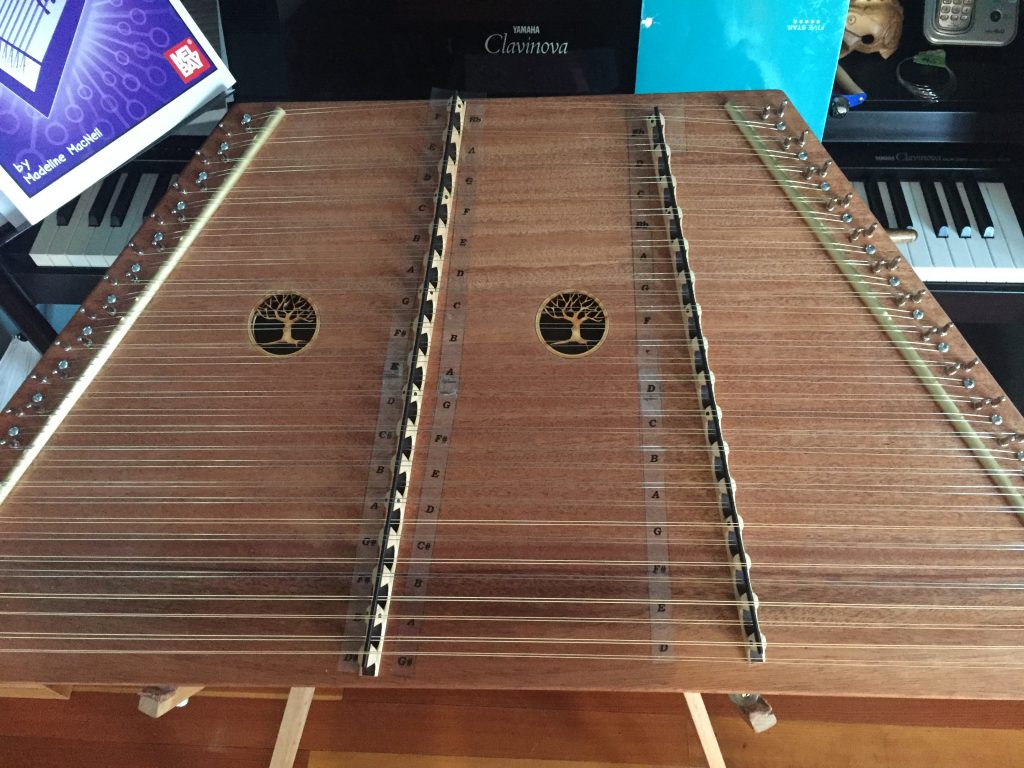
Finished building my 2nd hammer dulcimer

Although I’m still quite liking the current dulcimer I am playing that I bought off Ebay, I was curious how much time and effort is required to build one from a kit. As a previous post notes, I crafted a 16/15 dulcimer from ‘scratch’ a couple of years ago, but found that although it sounds LOUD, it is very heavy and has some string spacing issues. I guess it is more of a parlour dulcimer but I want one that I can take to gatherings and jams. I also thought by building a kit, I would be able to absorb the skills from another craftsperson, save some money and have some fun with a new project.
I ordered two kits from Music Makers from Minessota:
- a Reverie Harp kit – ($269 US) sells assembled and finished for $599 US
- a 16/17 Dulcimer ($475 US) sells assembled and finished for $950 US
The kits arrived as expected with no damage. On initial exploration I was impressed by three things:
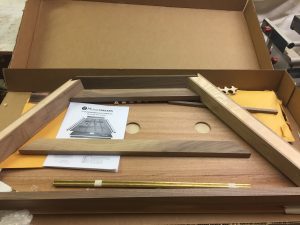
- The instruction booklet was very detailed and when I followed it EXACTLY I didn’t really have any problems – when I did the usual man thing and didn’t read the instructions carefully, I had to redo a couple of small details – but no major mistakes.
- There was no knots or imperfections in the wood- something I had to deal with when making the last one from rough lumber.
- The side pin blocks, which has to withstand
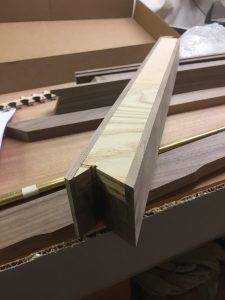 the tension of all the strings, are best made out of laminated hard maple – and they were in the kit. But they were slotted into the walnut sides producing a nice dark effect and still highest quality. It took me some time to figure out how I could replicate the joinery if I make another with a similar design.
The glue up went pretty well as expected – but as always you never have enough clamps (as evidenced by the hodge podge connection of clamps I used). Both the back (3/16 hardwood plywood) and the top (solid mahogany) were oversized so I had to either sand or
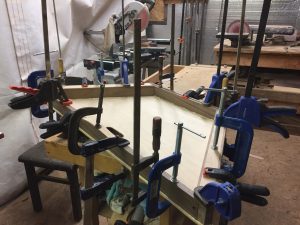
use a trim bit on the router to cut them to exact size after gluing. I likely should have taken the router out of the router table (given the size of the glued up dulcimer) and perhaps scored the cut, but I managed to trim it down, with only one small run out. This run out into the top caused me to have to round the edge more than I had originally intended but it looks fine now.
The sanding and finishing went well. My 30 year old finishing sander finally died (29 years after it sanded well). Giving me a good excuse to purchase a new oscillating hand sander ($100). I didn’t stain it – as the mahogany and walnut look fine and I put on about 6 coats of rub-on polyethylene.
The kit didn’t come with the usual hitch pins, but with stainless steel screws to hold the strings at the end of the strings without the tuning pin. This made it easier to hook strings on and drill receiving holes but doesn’t look as traditional as most hammer dulcimers. However, I didn’t want to wait for an order of hitch pins and so used the screws.
The stringing and tuning went as expected, but didn’t take as long as my last one as a single string was used, wrapped from the tuning peg to the screw hitch pin and then back to a second tuning pin to create a double string for each of the 33 courses. As expected the strings stretched after installation and the treble bridge had to be shifted back and forth to get the right position to give it tuned on both sides, but it worked out!
 And most importantly it sounds pretty good!
Now my last problem is finding out what to do with my 5th hammer dulcimer!! Anyone want to buy a brand new 16/17 dulcimer??
Classical Chinese Dance and Music Concert

Did I ever tell you about the time I starred in a Classical Chinese Dance and Music presentation?
Last night my host here at Jiangnan University invited to go with her to the annual performance of the students in the classical fine arts program here at the University. We got great seats in the campus performance center, which is a fairly large concert hall seating perhaps 1500 people and it was about ¾ full. The set was of the stone arch bridge and simulated streams that characterize this campus.
The program consisted of a mixture of dance and classical songs each based upon well known Chinese poems. Of course I didn’t understand the language but Zhijun was able to find English translations of some of the poems. So I got to appreciate the often melancholy but also occasionally joyful emotions, movement and sounds created by the dancers and musicians.
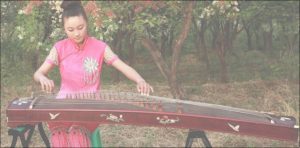
Traditional Chinese Guzheng
I was especially interested in two of the traditional instruments. One, the guzheng was not unlike the hammer dulcimer that I’ve been building and playing the last few years. It had about 20 strings but rather than being struck with hammers, it was plucked. supposedly “Guzheng’s sound touches the Heavens above and the Gods and spirits below.”
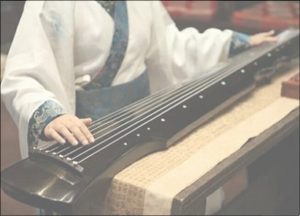
Guqin, China’s oldest instrument.
The second instrument is called a Guqin, not unlike a zither. It too was played horizontally, and plucked or stroked by the musician. It however had a fret board so each of the seven strings could be shortened by the musician to create higher notes and eerie slides. According to TopChinaTravel “Chinese ancient scholars have to acknowledge four art, including play the Guqin, play Chinese chess, write good calligraphy and draw painting”
A bit surprisingly at the end the audience very briefly clapped and then proceeded to exit the auditorium. Meanwhile the cast was still all on stage, the director accepting a bouquet of flowers and everyone doing a final bow – to the quickly emptying auditorium. My colleague Zhijun asked if I wanted to go up and take a picture of the musical instruments. I thought that was a good idea, so we proceeded up near the front waiting for the photos to be completed and cast to disburse. However, soon the director noticed me standing there and came down and insisted that I come up and get my picture taken with the cast. And not only that, but I was dragged up beside her, right in the center of the cast. Then the official photographer arrived and seemed to take forever snapping pictures and me looking and feeling pretty goofy as if I was really desperate to get my picture taken.

Crashing the photos take at Jiangnan concert
Likely you won’t have to guess “Where’s Elmo” to see me in the picture. After the photos were finally done, I was able to take my picture of the instruments and get off that huge stage.
As I look at this photo I realize I don’t exactly blend in with the crowd. Last Sunday I was visiting one of the ‘ancient villages” near Wuzi, and a little 4 year old boy came up and asked my colleague if I was a “real foreigner”. This prompted me to think well maybe I am starting to look just a little bit Chinese, but tonight’s photo proves that I’ve a long way to go.
My New Hammer Dulcimer – FINISHED

After nearly exactly 3 months on and off work my new 15/14 hammer dulcimer is finished. I’ve have been playing my Dusty Strings 13/12 dulcimer (the numbers stand for the number of notes (or courses) on each bridge) for the past three years. For those not very familiar with this instrument Ardie Davis has a description and a nice American-slanted history article. It is a great starter instrument, 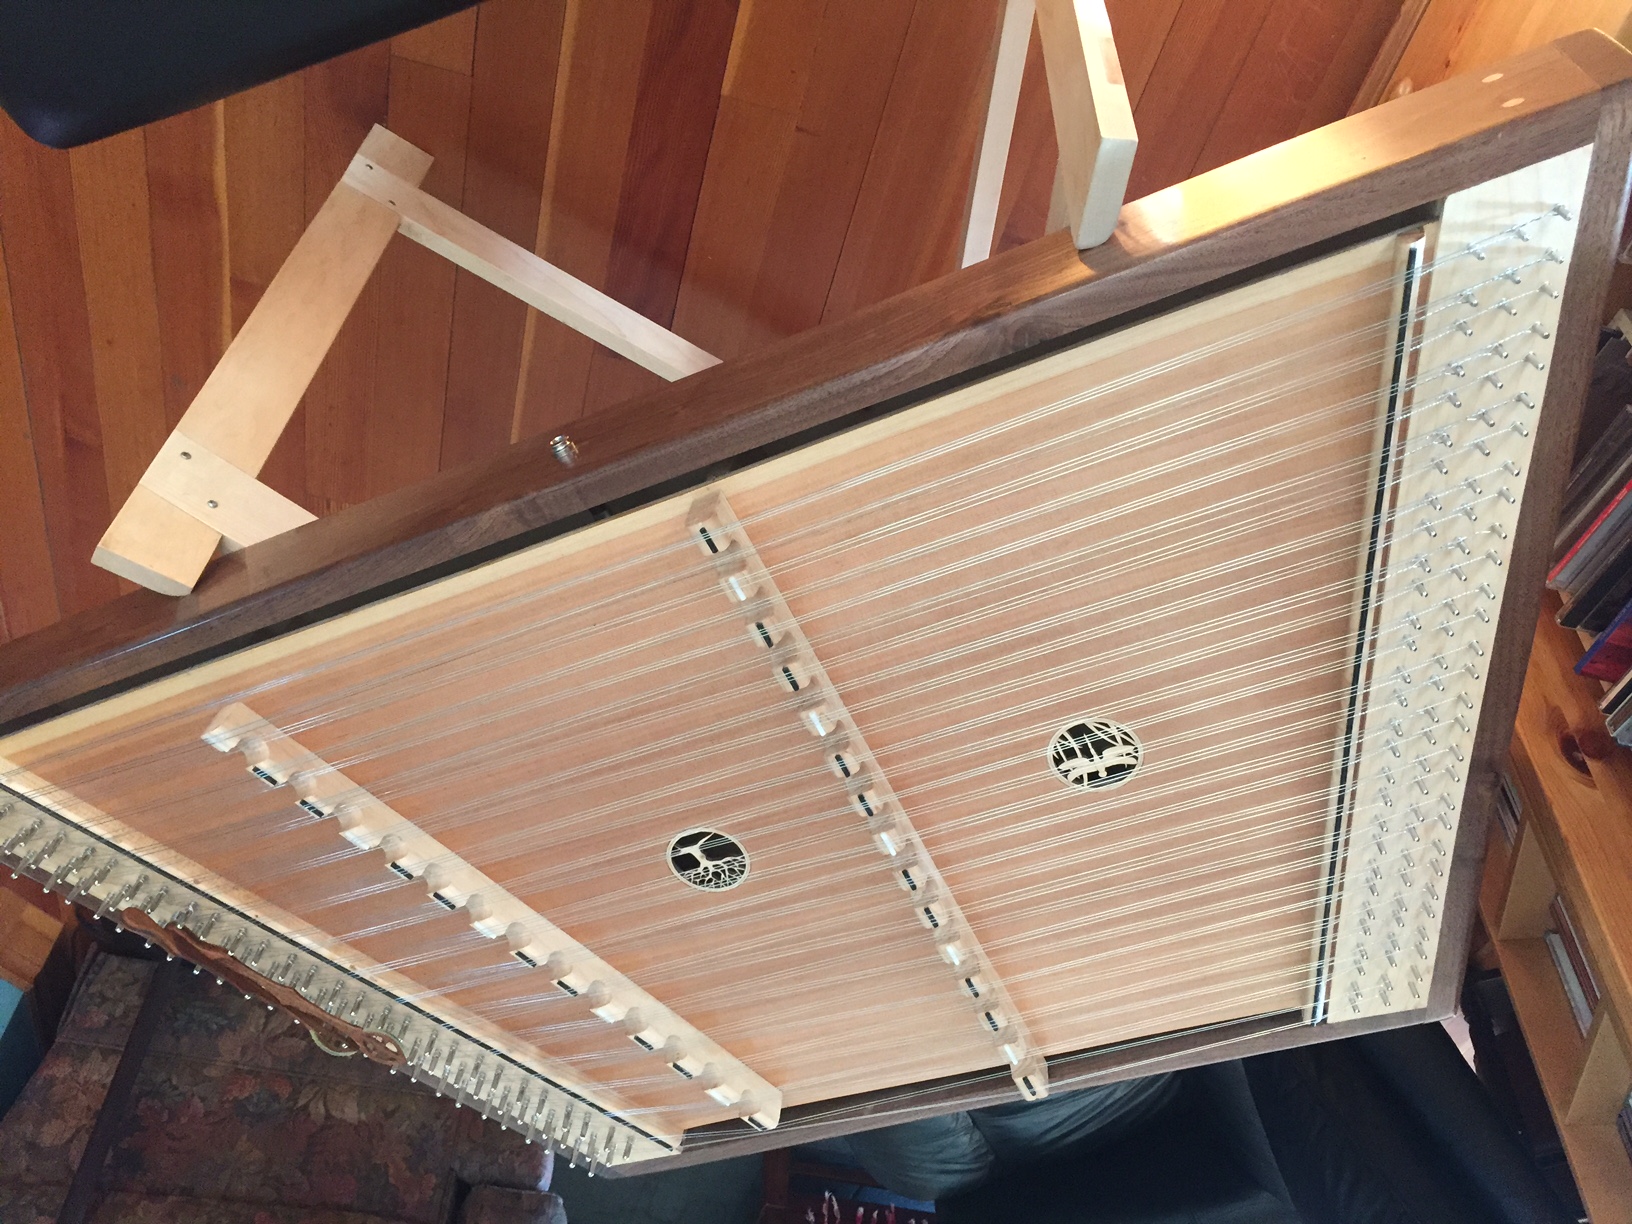 but I began to crave a lower register, more sound and an opportunity to revive my wood shop. This project met all three goals.
It isn’t really necessary to take 3 months to build a hammer dulcimer and I wish I had of taken better attention to the actual time taken. But needless to say, this project was working on ‘retirement time’. For me that meant renovating the downstairs bathroom, moving through 2 of my Grad students defenses, skiing with my brothers and three writing “beyond LMS” articles for Contact North besides building a dulcimer.
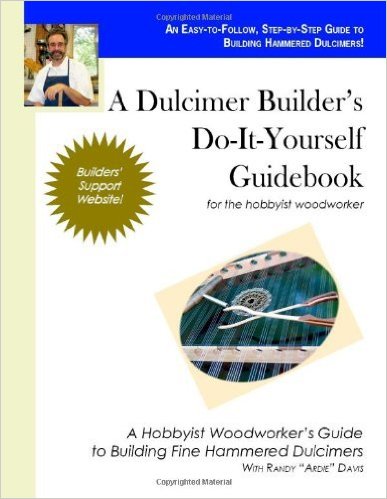 Being both an amateur woodworker and a very amateur dulcimer player, I asked Mr Google to recommend a set of plans or a good book. Luckily Ardie Davis has a great, ‘step-by-step” book that I followed quite religiously. The rest of this post is likely only of interest to those thinking about constructing a hammered dulcimer and thus I go into more detail than the average reader will likely find of much interest.
As Northern Alberta is not known for the quality (nor quantity) of our hardwoods the first move (after a good reading of the book) was a trip to the commercial hardwood store. Exotic wood like walnut, sugar maple and baltic spruce are NOT cheap, but for $170 I walked away with 3 large hunks of rough cut wood (one walnut, 2 hard, sugar maple) and a 1/2 sheet 5/16″ baltic birch plywood. These hunks of wood were all that my 30 year old 3/4 horse table saw could handle (note to self – buy a new table saw!) but fortunately with a trip to a friends thickness planer they came out OK. I cut one pin block twice and it was still too short (sigh), so I had to glue on a thin piece, which you likely wouldn’t notice, except I’ve just told the world.
The sound board is the most important part of the dulcimer as it supports the 2 bridges and resonates under the strings giving the volume to the instrument. This design has a “floating sound board” meaning that it fits into dado slots on the sides and has a 1/2 gap at top and the bottom. This design allows maximum vibration of the sound board and lots of space for the sound to emerge. I was very fortunate to be given a piece of old growth, quarter sawn cedar, which a friend’s father had milled 30 years ago on Gambier Island off British Columbia. The grain was incredibly straight and we managed to cut it down to 1/4″ thick pieces and then laminate two together to make the 20″ wide sound board. Thank heavens for access to a thickness sander which did a terrific job on this heirloom cedar.
Following Ardie’s instructions carefully, I managed to cut and then glue up the 2 walnut end rails, side rails and the side pin blocks. Thankfully I had invested in 6 more bar 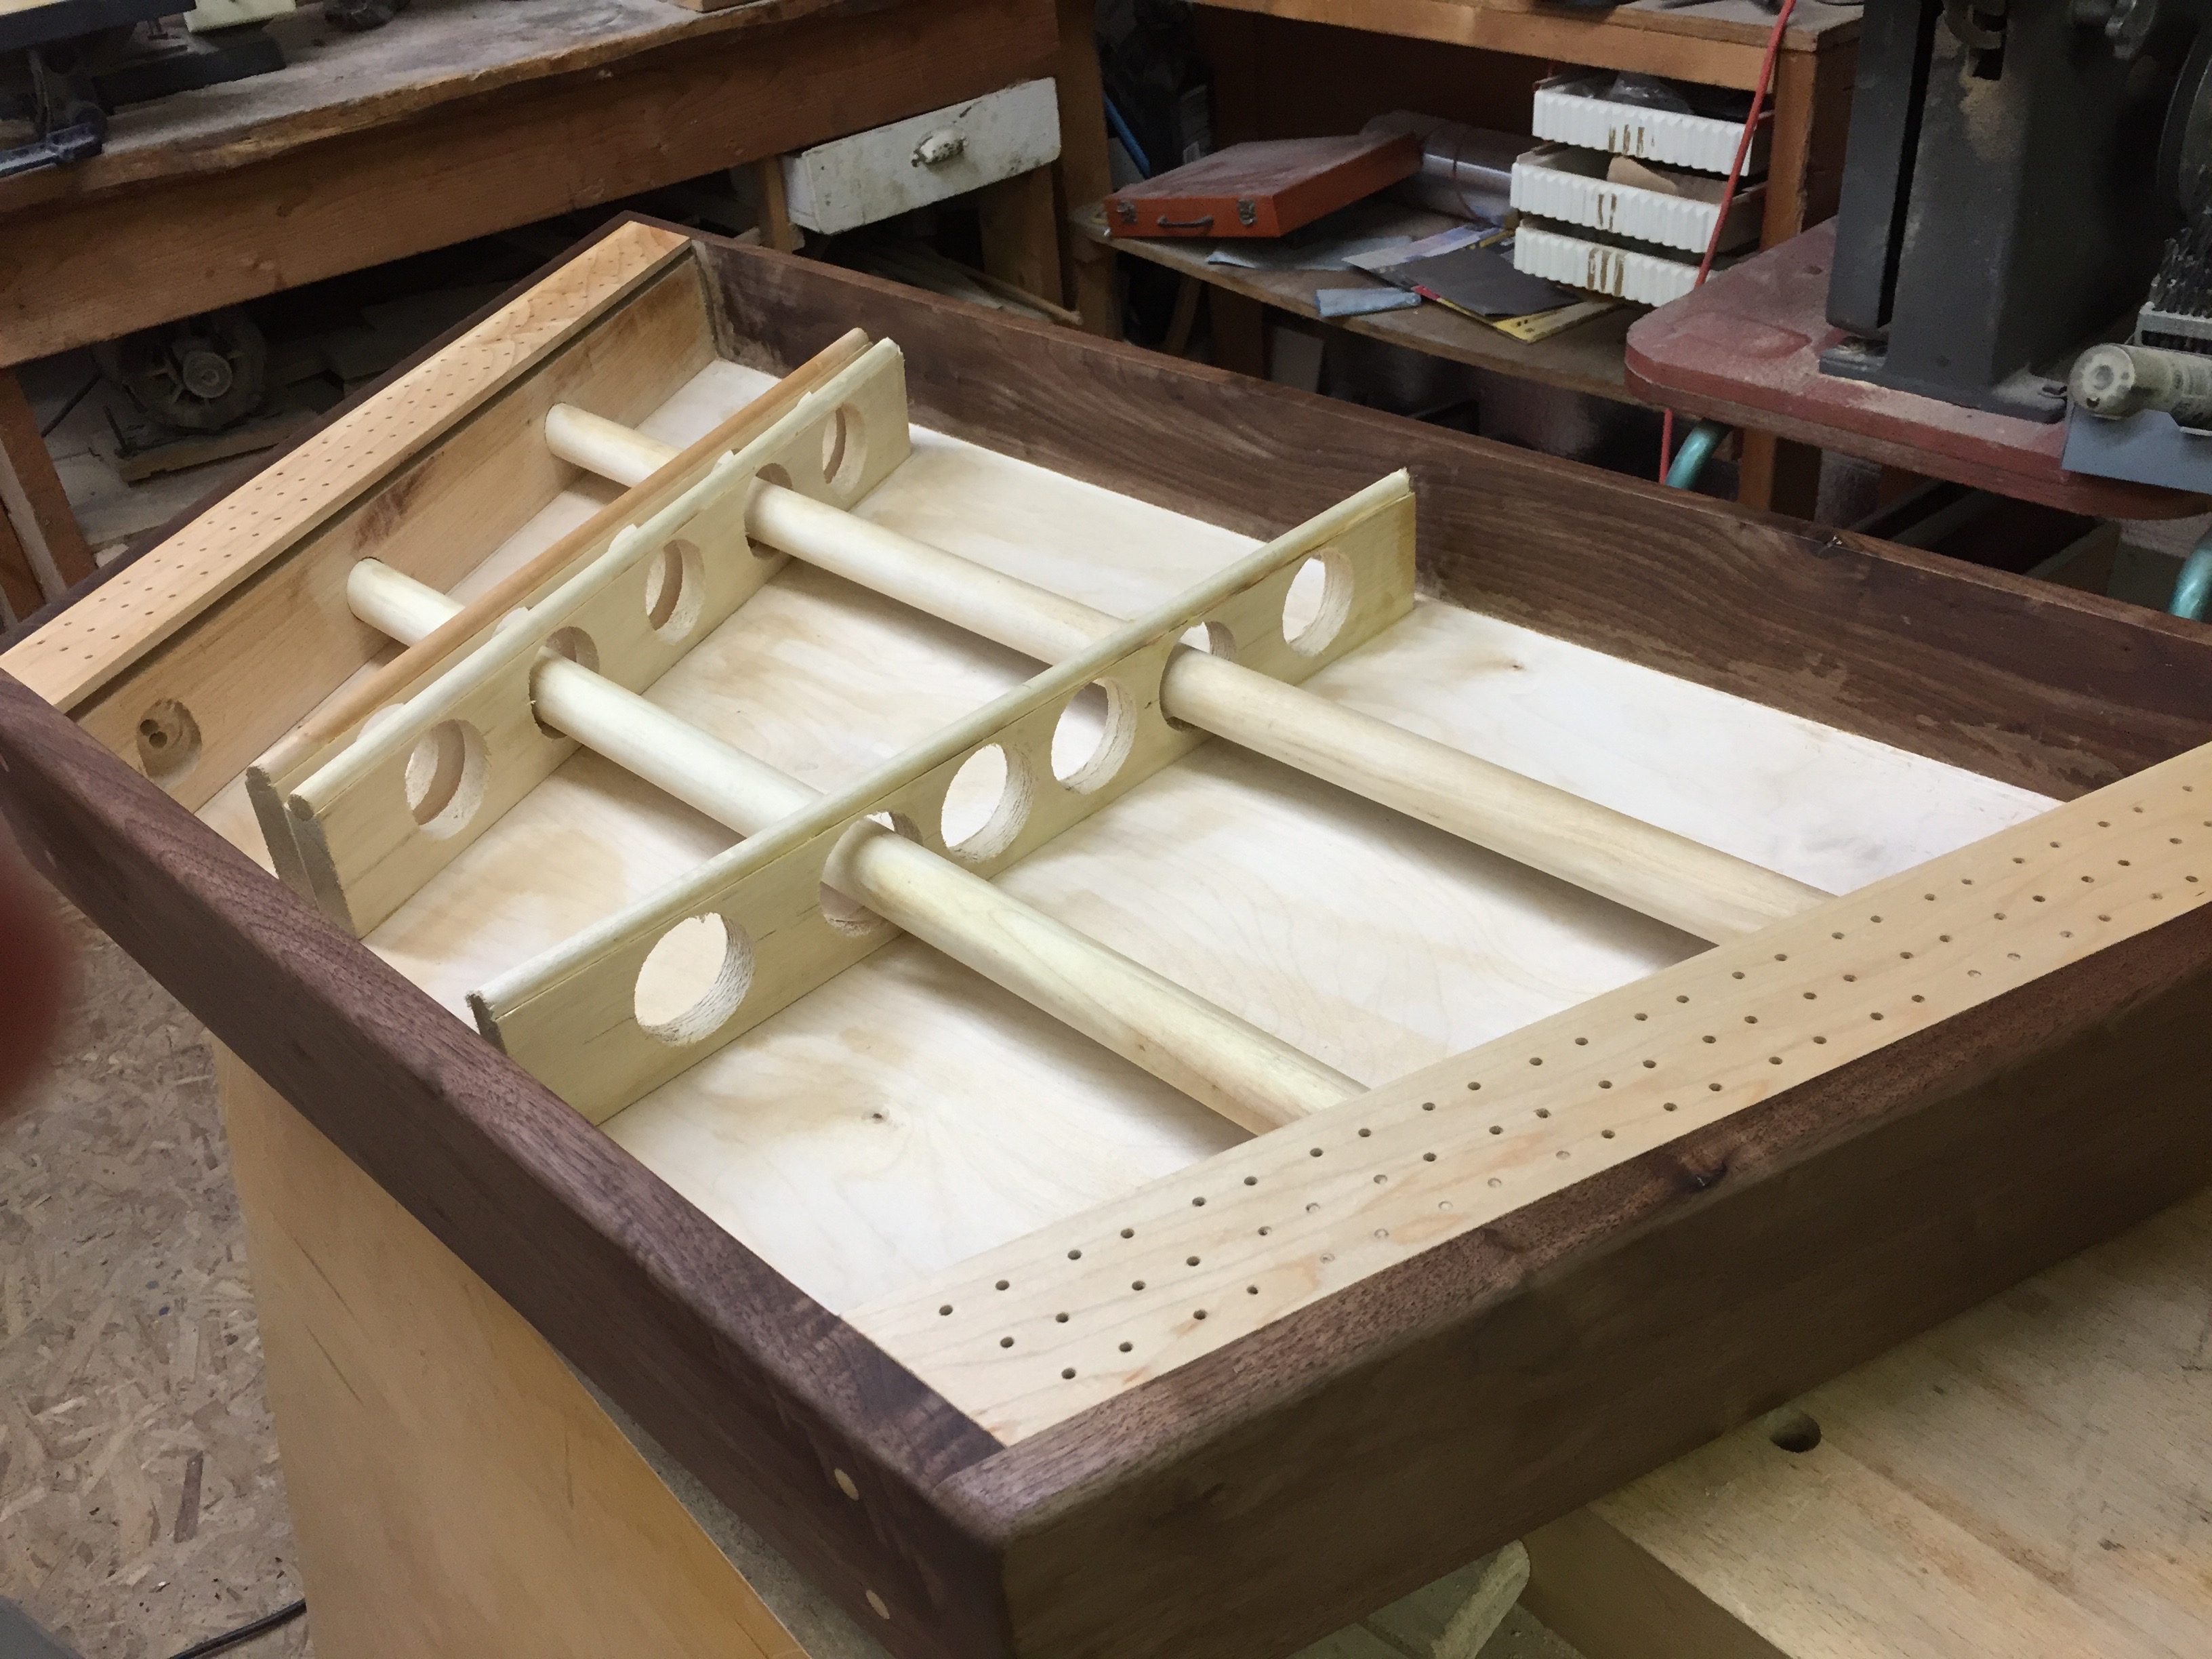 clamps – you never have too many clamps! These outside pieces enclose the Baltic birch plywood bottom in dado slots (also bought a very nice new dado blade!). Notice from the picture that 2 one inch hardwood dowels were inserted before the 4 sides were glued together. These are designed to take the load on the pin blocks when the 87 strings are finally tuned up. You can also see the three bridge supports – the only local wood (Aspen poplar) that a friend had milled in Northern Alberta. The bridge supports are needed, as besides lateral tension the strings also push the bridge down and would likely distort the soundboard without support.
Next came the making of the bass and treble bridges and the two side bridges also from the sugar maple. The sound bridges have holes drilled in them so that the strings can move across from one side bridge all the way to the opposite pin block without hitting any 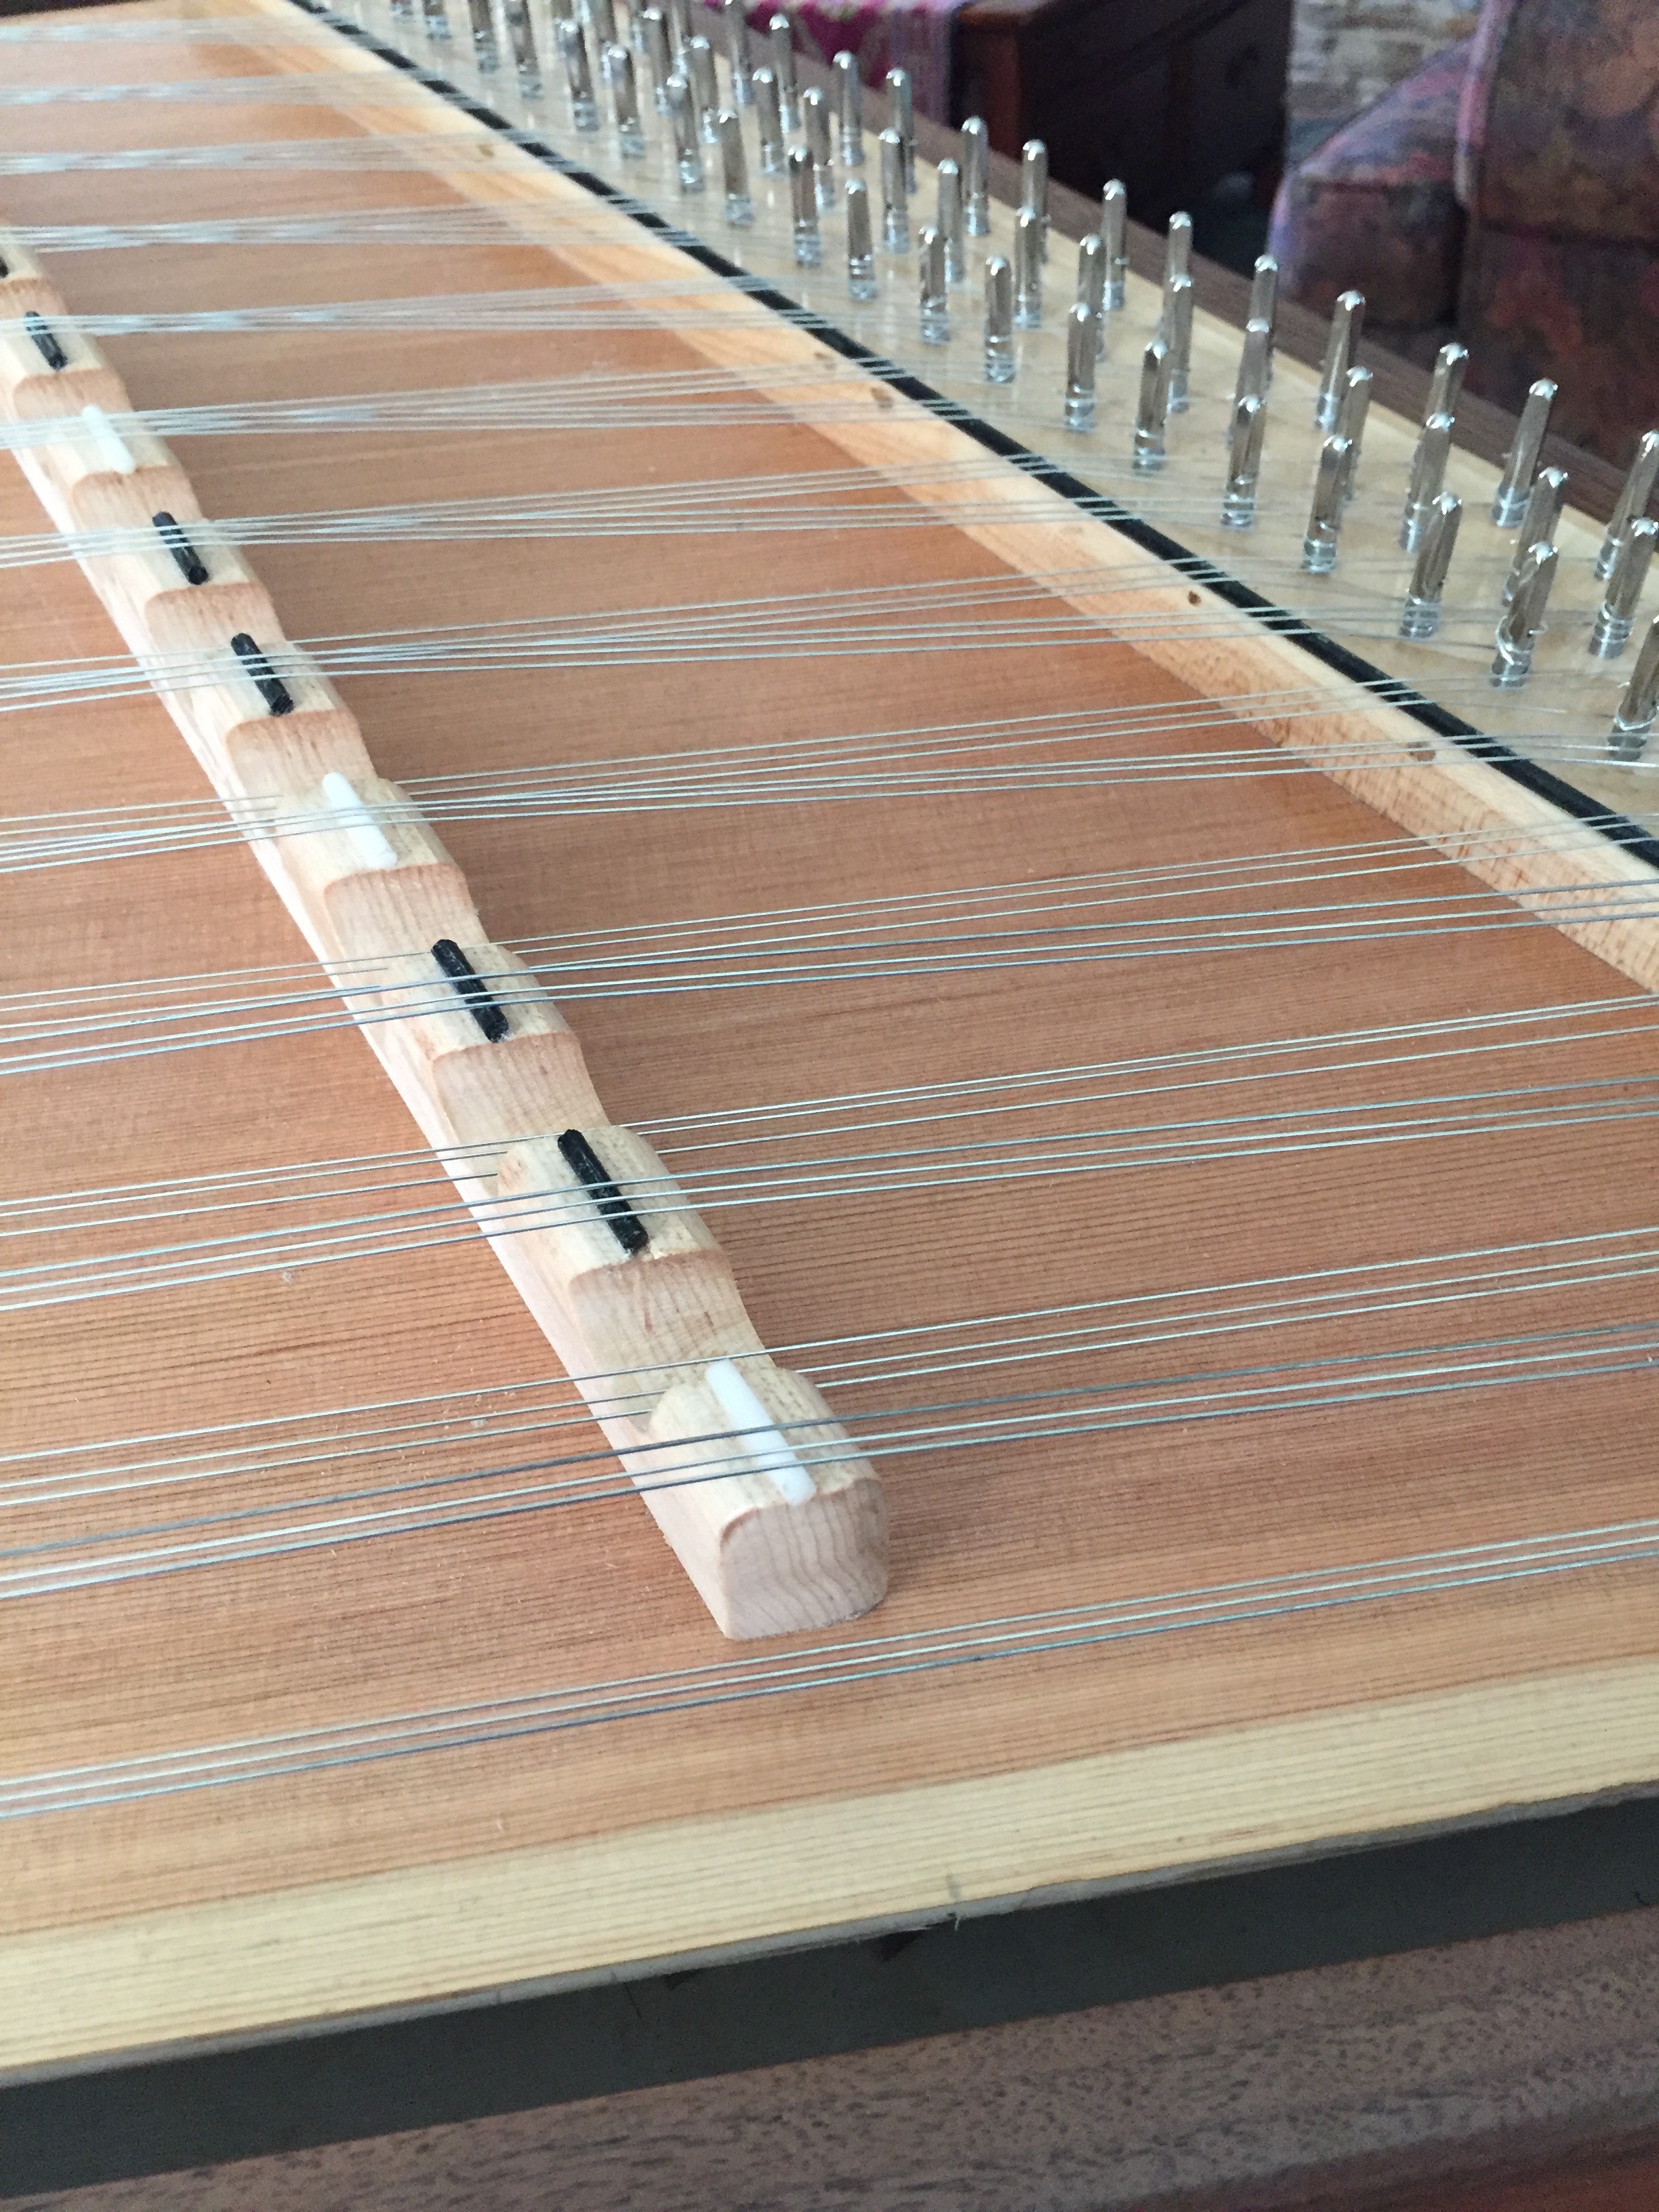 vibration ending pieces of the second bridge. I made the bridges slightly different than Ardie recommended and followed the design from my smaller dulcimer and others I have seen (see photo). I also didn’t thread the strings through the side bridges as Ardie recommends but led them on top under a piece of black devron plastic rod.
Next came adding a few screws and covering plugs, routing the rails and then hours of sanding!
I struggled with the decorative rosettes. On a floating sound board dulcimer like mine, it isn’t really necessary to have a sound hole to let the sound out, but they look so nice! So a good friend and I spent an afternoon on his CNC milling machine, taking some groovy pictures off the net and then importing the JPEGs into the machine’s software. Unfortunately, the cutter bits we had available were not fine enough and we eventually gave up and I ordered to two very nice rosettes ($14, US each) from the good folks at MusicMakers.
I ordered the hardware – tuning pins, hitch pins, and strings and received great service from James Jones Instruments ($168 US). How the low Canadian dollar hurts! Drilling the holes for the tuning pegs was relatively straightforward -AFTER you find the correct bit. Ardie recommends a #15 drill bit, which is not metric, and not American but an obscure machinists’ standard – sizes not carried by the local hardware stores. Fortunately, 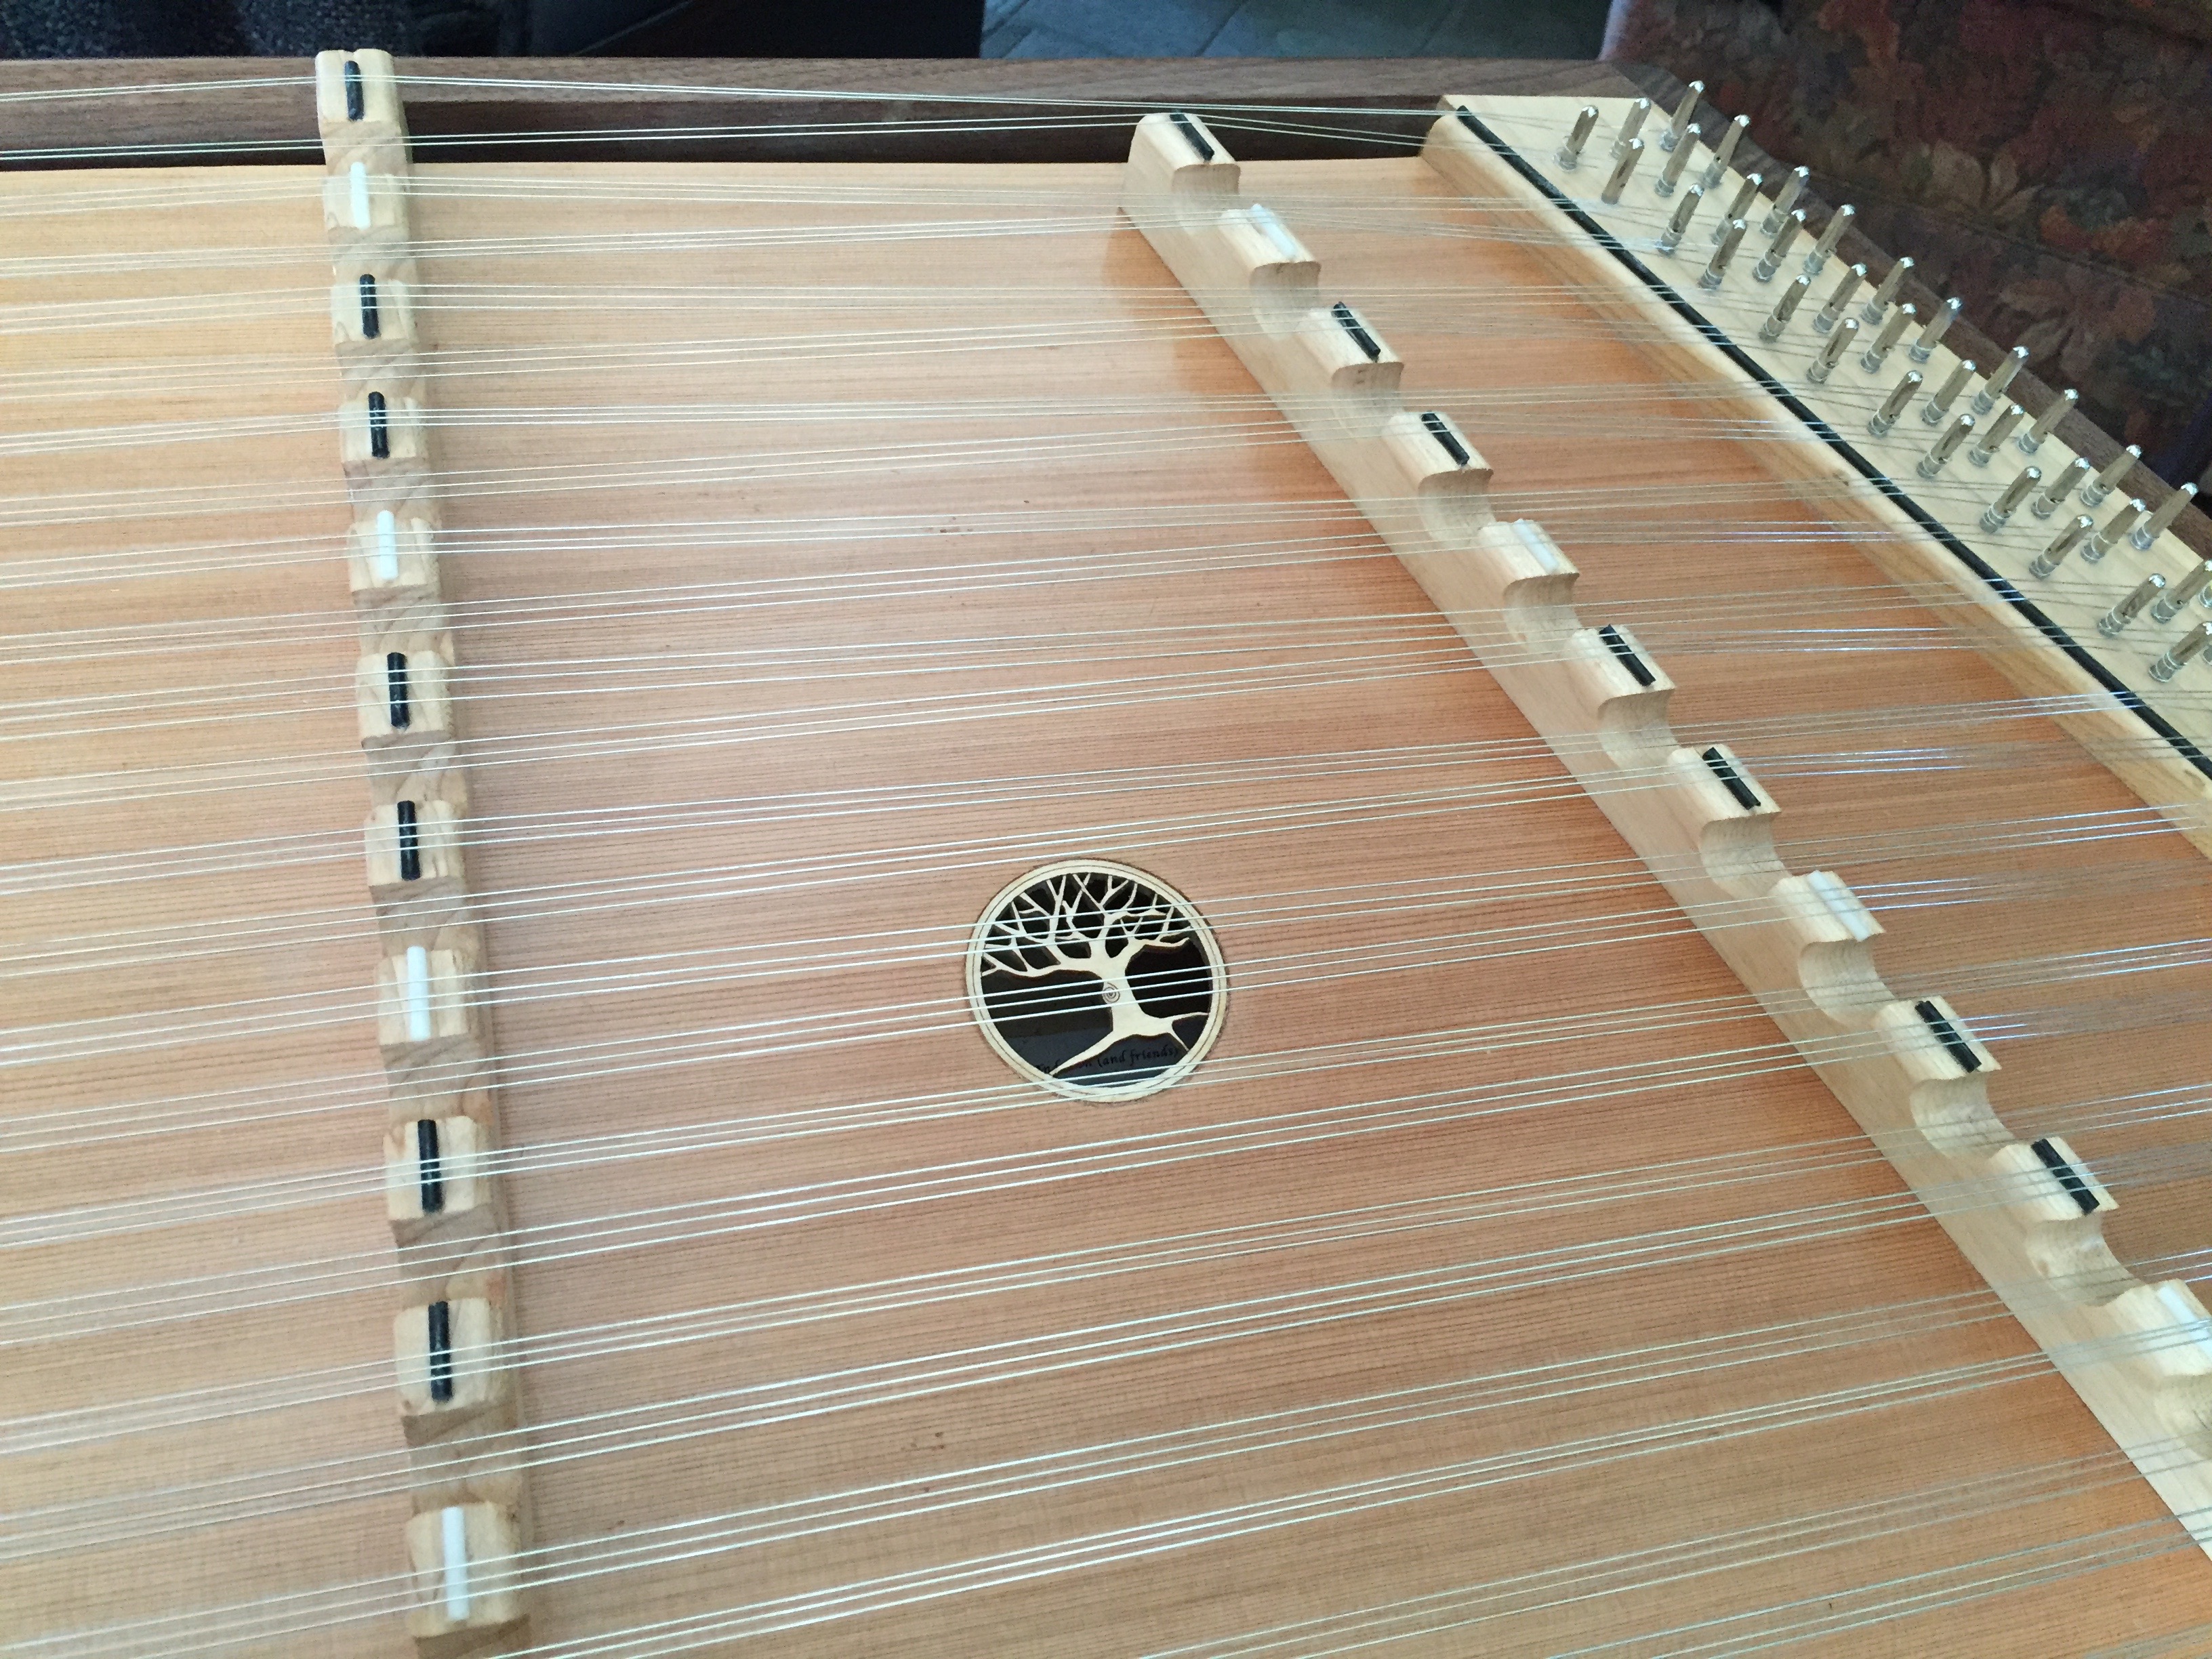 asking around, I found a friend who lent me a set of these specialized bits. The holes have to be exact as the very fine thread of the tuning pin has to dig into enough wood to provide a stable and long lasting bite into the wood, without requiring a guerilla sized arm to turn.
Finally, I was ready to start finishing (after more sanding). I decided to use MinWax Wipeon Poly and put on about 15 coats. Each coat dried quickly and although the finish isn’t factory perfect (I did it in my dusty wood shop) it looks OK. Ardie’s design allowed me to finish the soundboard before assembly and install it later, which was nice.
At this point I considered the value of installing a pickup to plug into my small guitar amp. I wasn’t sure it would really need the amplification, but if I didn’t do it now, I would never be able to get the amplification directly off the soundboard AND have it nicely concealed. So, I purchased a K&K 2 head acoustic pickup ($100) and installed the jack through the bottom rail.
While the finishing was taking place, I constructed the stand from maple according to the design Ardie recommends. In retrospect I should have made an adjustable stand that I could use standing up or sitting down, but this one works OK.
Finally the day for the big string up! 87 strings makes for a whole day of twisting, turning and coaxing wires around twice as many pins. I should have ordered a few spares of the top thin wires as one broke immediately and a second the following day. However, with 3 strings per note, you can get away with a few missing strings! The tuning seemed to take forever as the strings stretched and the whole dulcimer creaked! My trusty tuning app on the IPhone was indispensable for this task. Numerous times, I would finally get the last strings in tune, only to find that the ones I had started with had all gone out of tune – sigh.
But eventually they stabilized and WOW what a sound compared to my smaller dulcimer.
All in, the instrument cost about $500 – in addition to providing rationale for buying a new (to me) router, router table and two new saw blades. The retail cost of such a dulcimer is around $1500 Canadian – and the pleasure of playing is priceless!
Lessons learned:
1. Don’t build an obscure instrument before the Internet – these long tail hobbies need a way to connect with suppliers and advice.
2. Use what social capital you have to beg and borrow both local expertise and tools.
3. Don’t strive for perfection – it is supposed to be a fun job!!